
Contriver
Created using Unity
Platform : PC Windows
Project Time 93 days (9 September - 11 December)
Links
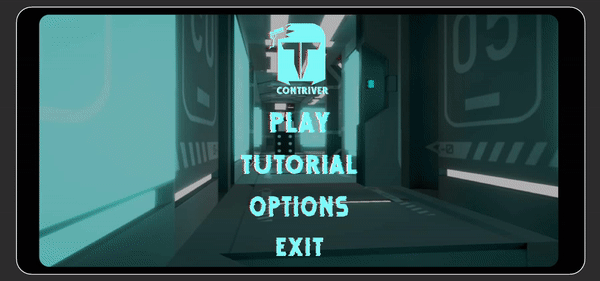
.png)
Contriver is an action Sci-Fi gun-building game, where the player takes control of a Contriver; a futuristic bounty hunter. The game takes place during the Contriver annual Point-Blank event where the Contrivers enter a blood sport event that pits Contriver against one another. The players must face off fellow Contriver in a gun-building event to determine the winner.
FEATURES
-
Mobile device game
-
Touchscreen and gyroscope mechanics
-
Assembling guns
What I worked on
Single-player, Mobile gun-building game, Lead programmer. (Team of 8)
• First major project to collaborate with larger team size.
• Design and implement core mechanics of gun assembly with mobile touch controls, accelerometer, spawning gun components, and snapping gun parts onto attachment slot.
• Create Menus, and cutscenes, set up lighting and post-processing effects for the project, and ensure the game is well-optimized to run on a mobile phone.
Challenges & Solutions
-
Core Mechanics of Gun Assembly
One of the most challenging parts of this project is to create the main mechanics for assembling the gun, the concept is to have the main part and the rest of the parts attached to the correct spot on the main gun, but there is little information on creating this type on mechanics, the team consult with our mentor each step when developing the mechanics and thanks to their guidance we are able to implement satisfactory functions for it, this functions heavily depends on parenting and calculate the spot of attachment and it helps us have a better understanding on how those mechanics works.
-
Optimization for mobile devices
Optimization of the game is a constant issue as we implement more stages and mechanics into the game while making sure the game looks good and run smoothly, it is one of the most common feedback we get from the playtester as the game will have performance issues on older devices, to overcome this issues we look into the texture and lighting of the game, we tune down the sample size for the texture of the game assets as well as to use more static lighting which helps greatly in improving the performance.
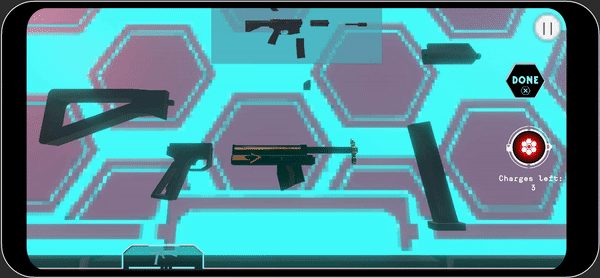
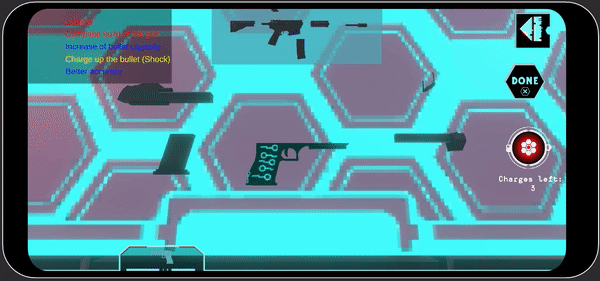
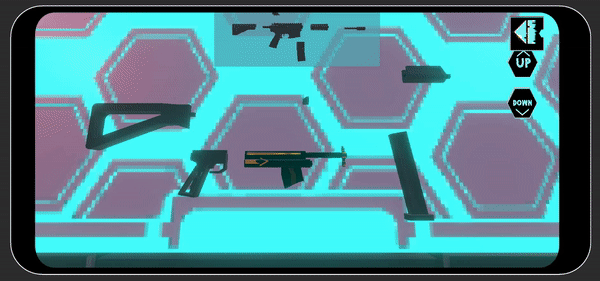
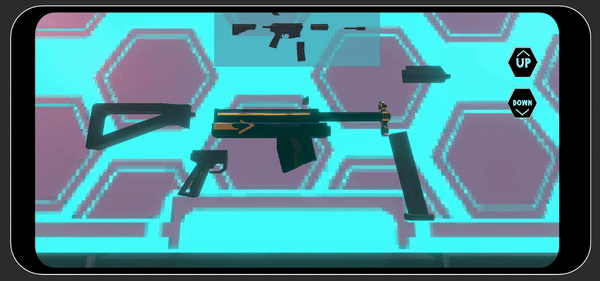
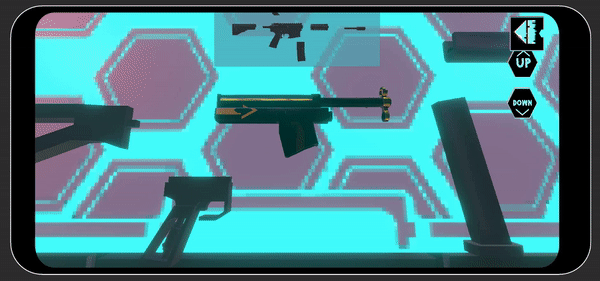
Game Screenshot


Game Gameplay

Mechanics Explanation:
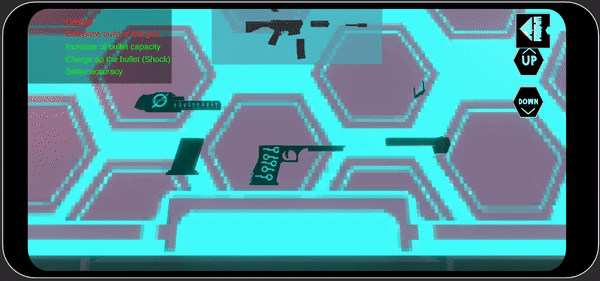
Gun Compartment
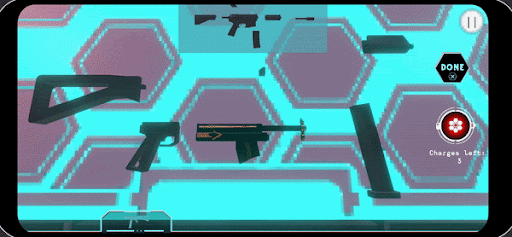
In the Preparation phase, the player can press the gun compartment button at the bottom of the screen to pull up the parts panels. The panel consists of extra parts of the gun for the player to swap.


To swap the parts, the player will need to drop the corresponding gun types sprites from the panel onto the correct slot on the game screen, each slot will be assigned with a slot ID in the DropSpot script and each sprites will contain a SlotID for the sprites to instantiate the gun parts at the correct spot.


When the player successfully swap the gun parts from the gun compartment, the sprites will change from improved parts back to the normals, then it’ll destroy the gun on the corresponding slot before instantiating the new gun parts at the drop spot. If the gun is charged then it’ll refund back the charges to the core manager script.
Table Slot Snapping


In phase 1 when the player is preparing the gun, the gun will be in a fixed slot depending on the SlotID in the gun’s SnapToSlot script. The table will have several objects that have slot tags and use a box collider to detect when a gun’s part needs to be snapped to the table slot. When phase 2 starts, the table slot will be disable.
Parts Charging


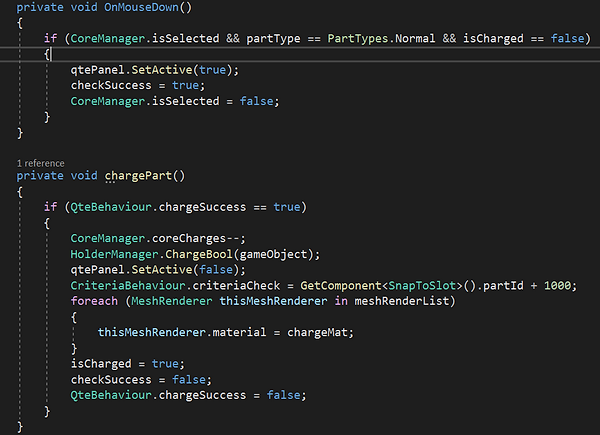
To charge a part, player will need to press on the core UI to activate the core, then press on any parts of the gun that’s Normal Type to trigger a QTE, if the QTE is successful, all of the selected parts meshes will change to the improved material, the core charges will be deduct as well.
Shake To Reset


The shake UI will pop up when a wrong part is charged, we can set up which part shouldn’t be charged using the inspector in the HolderManager. When the boolean is false and the gun type is charged, the Shake UI will show. The player can shake the phone and in the accelerometer script the ResetCharge() function will be called, changing all the charged parts back to normal material and types, as well as refunding the charge count. When the ResetCharge is being called, the camera will shake for as long as the duration and the intensity can be set in the inspector as Magnitude.
Gun Assembly (Dragging Movement)


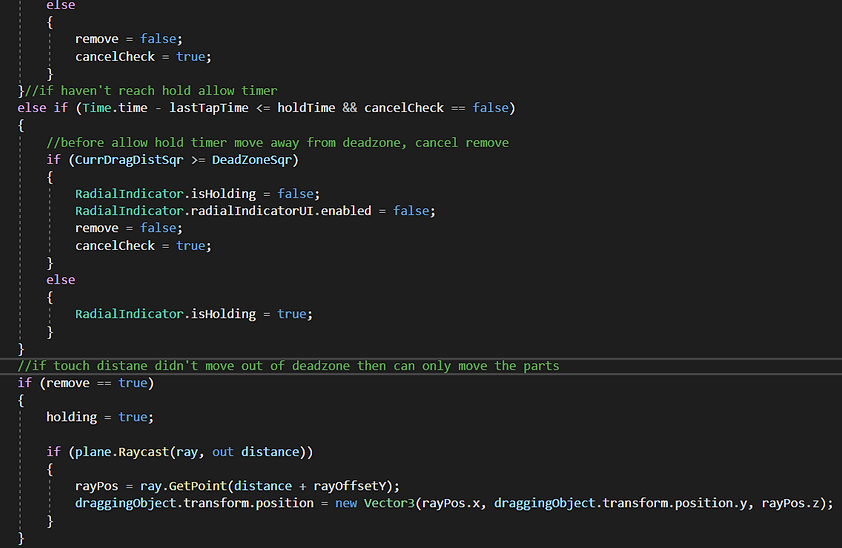
The dragging movement is separated into 3 different phases, The MouseDown, MouseDrag, and MouseUp, to drag the parts, for the dragging part, uses a ray cast to detect the part that’s being selected and by setting a plane in the scene to decide which translation the transformation of the part should go. The X-axis and Y-axis movement of the touch position is turned to X-axis and Z-axis. If the parts are not connected to the main body then we can drag the parts normally, but if it’s connected to the main body then the drag function will be skipped and processed to remove parts mechanics. There’s a timer for holding the parts before it’ll be removed from the main body, to cancel the removing function, the player can move the parts out of a set radius of deadzone to cancel the removing function. When removed, a circular timer will be shown on the screen to let the player know when the parts will be separated.

For the MouseDown, when the player first presses on the parts that have drag movement attached, it’ll be picked up, by using a timer for double tapping, the player can drop the selected objects onto the table.

For the MouseUp parts, when a part is removed from the main body, a number of functions will be set back to normal to allow snapping again in the future, the parts will no longer be the child gameobject of the main body.
Snapping Mechanics
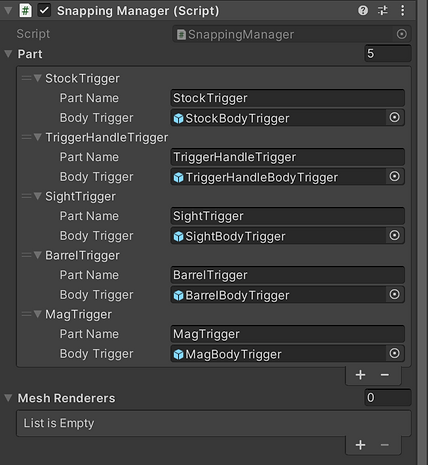

The SnappingManager is used to attach the gun’s parts onto the main body, only the body needs the snapping manager script attach, for the parts list, it uses the Part Name to check if the corrects types of parts are being detected or not before it attach the parts onto the main body. For the body trigger, it’s using a gameobject with a box collider to trigger which location the parts allow to be attached onto.


The CoreChildTrigger script attached to the child trigger of the gun body will check if the dragged parts if it’s the correct part using the other gameobject tag when it entered the box collider zone, then it’ll run the snapping function when correct parts are detected.

To snap the parts onto the main body, the script will get the offset of the parts from its child PartsTrigger script, then it’ll move the gun’s parts to the body trigger gameobject position, to make it appear correctly attached, it’ll adjust the parent position with the offset it should have when it’s separated, by adjusting the parent position the child position will be affected as well, so it’ll deduct the offset on the other parts trigger, when the gun’s parts position are correct then it’ll be set as a child of the main body object. After that, the other’s parts trigger will be turned off to prevent any unwanted collision.

Vertical Movement


The vertical buttons allow the player to move the selected parts vertically by pressing on the up or down buttons, only 1 object can be selected and whichever object is last pressed is being selected. If all parts are resting on the table then the buttons won’t move any object.
Gun Outline
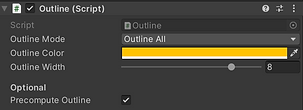
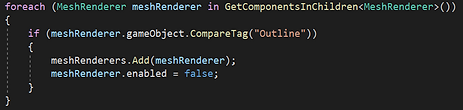


The outline script is using an assets from the unity store, to trigger the outline when selecting the part, the DragMovement script will enable the outline when the parts is being drag, to highlight the position on the main body, the outline index will send to the SnappingManager script to call the EnableOutline() function using the index.
Opening Cutscene


The opening cutscene is using the 3d model of the door together with animator, only when the player is played from the main menu will the opening cutscene start playing, giving a smoother transition between main menu and level selection scene.
Game lighting


The lighting setup of the level selection scene, there’s only 1 directional light to light up the NPCs in the level, for the basement it’s using emission map from the model texture to light up the environment, those lighting are baked into the texture map to help with the game performance, to set the mood of the basement we used a dark studio HDRI map as the skybox.


The gameplay scene used point, directional and spot light, all are using baked light to minimize the impact on the mobile performance, for the skybox, we’re using night neon street to set the mood for futuristic settings of our game, the point light and spot light is to light up the table for more dynamic colors, as for the directional light it’s to set up the overall mood of the scene.
Post Processing

The post processing for the level selection scene uses bloom to light up the emission map from the basement objects, the Gamma gain is used to adjust the contrast of the level, a slight color adjustments to increase the saturation of the color, then using shadows, midtones highlights to adjust the darkness and highlights of the overall levels.

The post processing for the gameplay level is simpler to save resources, it uses bloom to light up the tables as well as the gun emission map.